Wednesday Walks | Doctor Who Experience

Being a nerd, I quite like a bit of Doctor Who – so, obviously I needed to visit the famed Doctor Who Experience in Cardiff Bay. The building is in Porth Teigr, not far from the BBC Studios where filming for Doctor Who takes place.  Though it’s not exactly the cheapest, the general admission ticket allows you to enjoy the Interactive Experience as well as a wander around the Exhibition Hall.  When I went, the interactive part starred the Eleventh Doctor (AKA Matt Smith) but since then they seemed to have updated it with the Twelfth (Peter Capaldi).  The Interactive Experience is made for the little ones, but it doesn’t mean I didn’t poo myself when it came to Weeping Angels section.  It was dark and had the odd flash of light to illuminate the Weeping Angels as you walked passed – to make it look as though they were moving every time you blinked.  Nope.  Nope.  NOPE.  (I’m a bit of a scaredy cat, could you tell?)

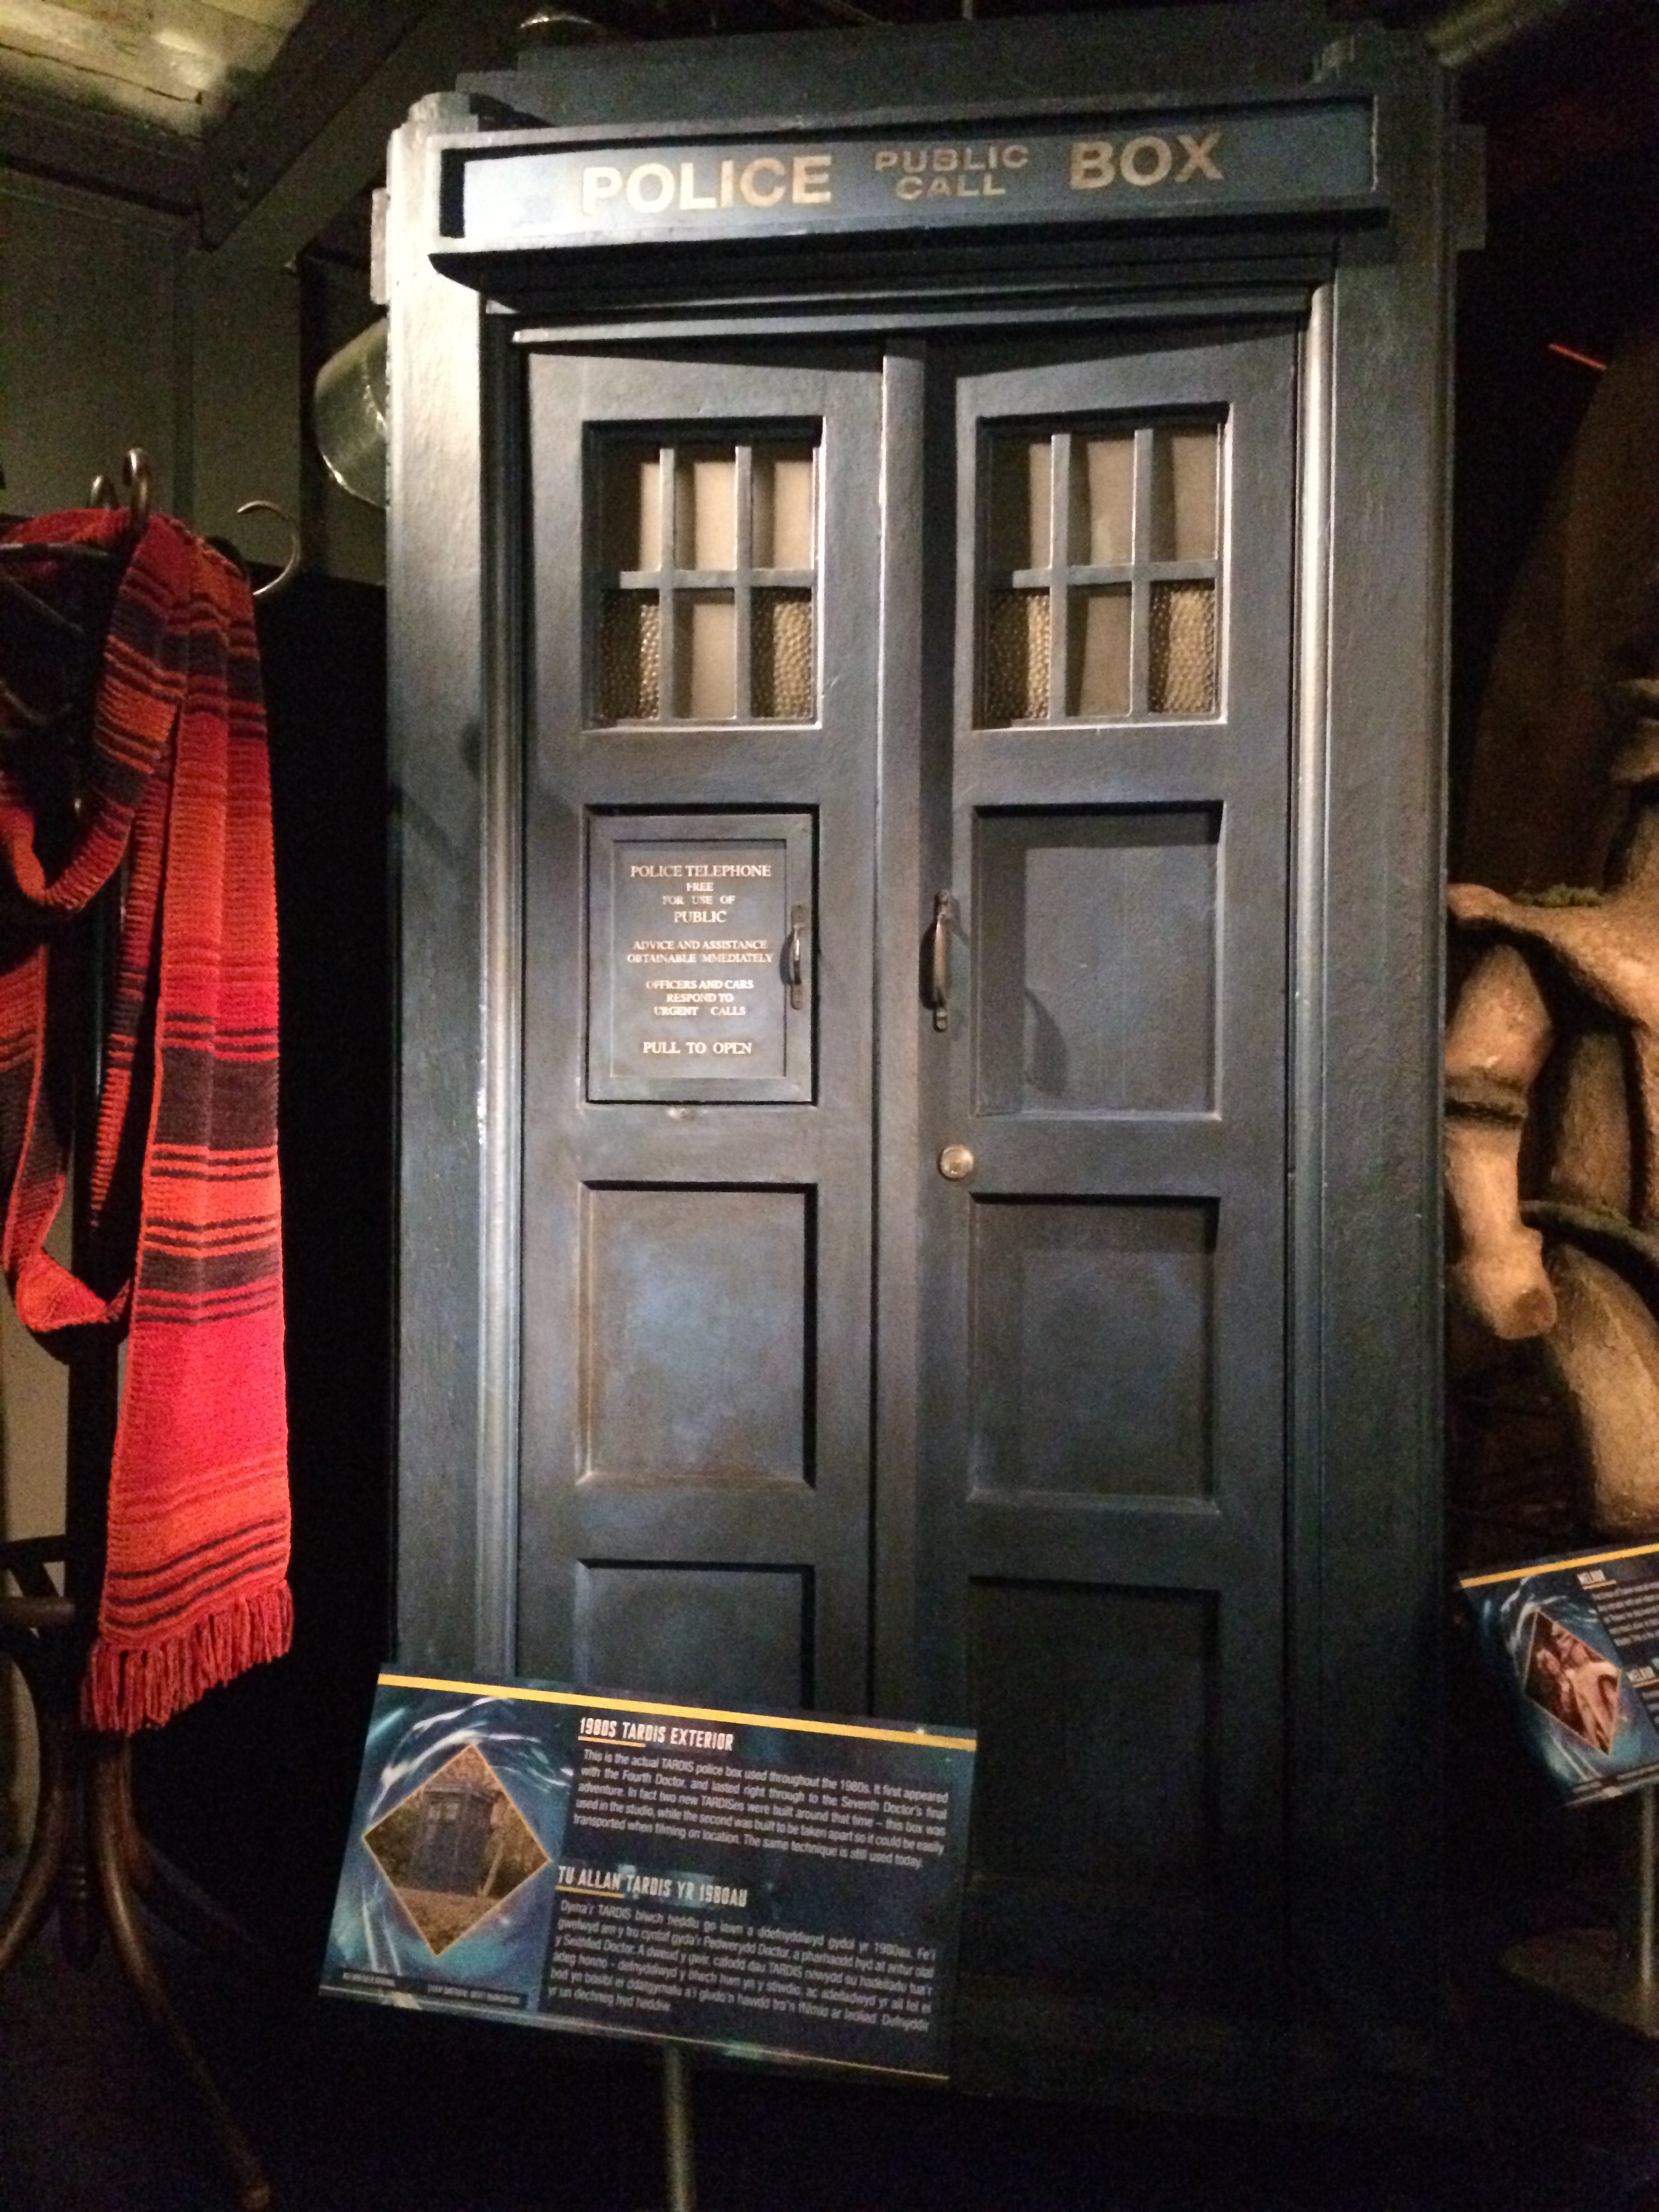
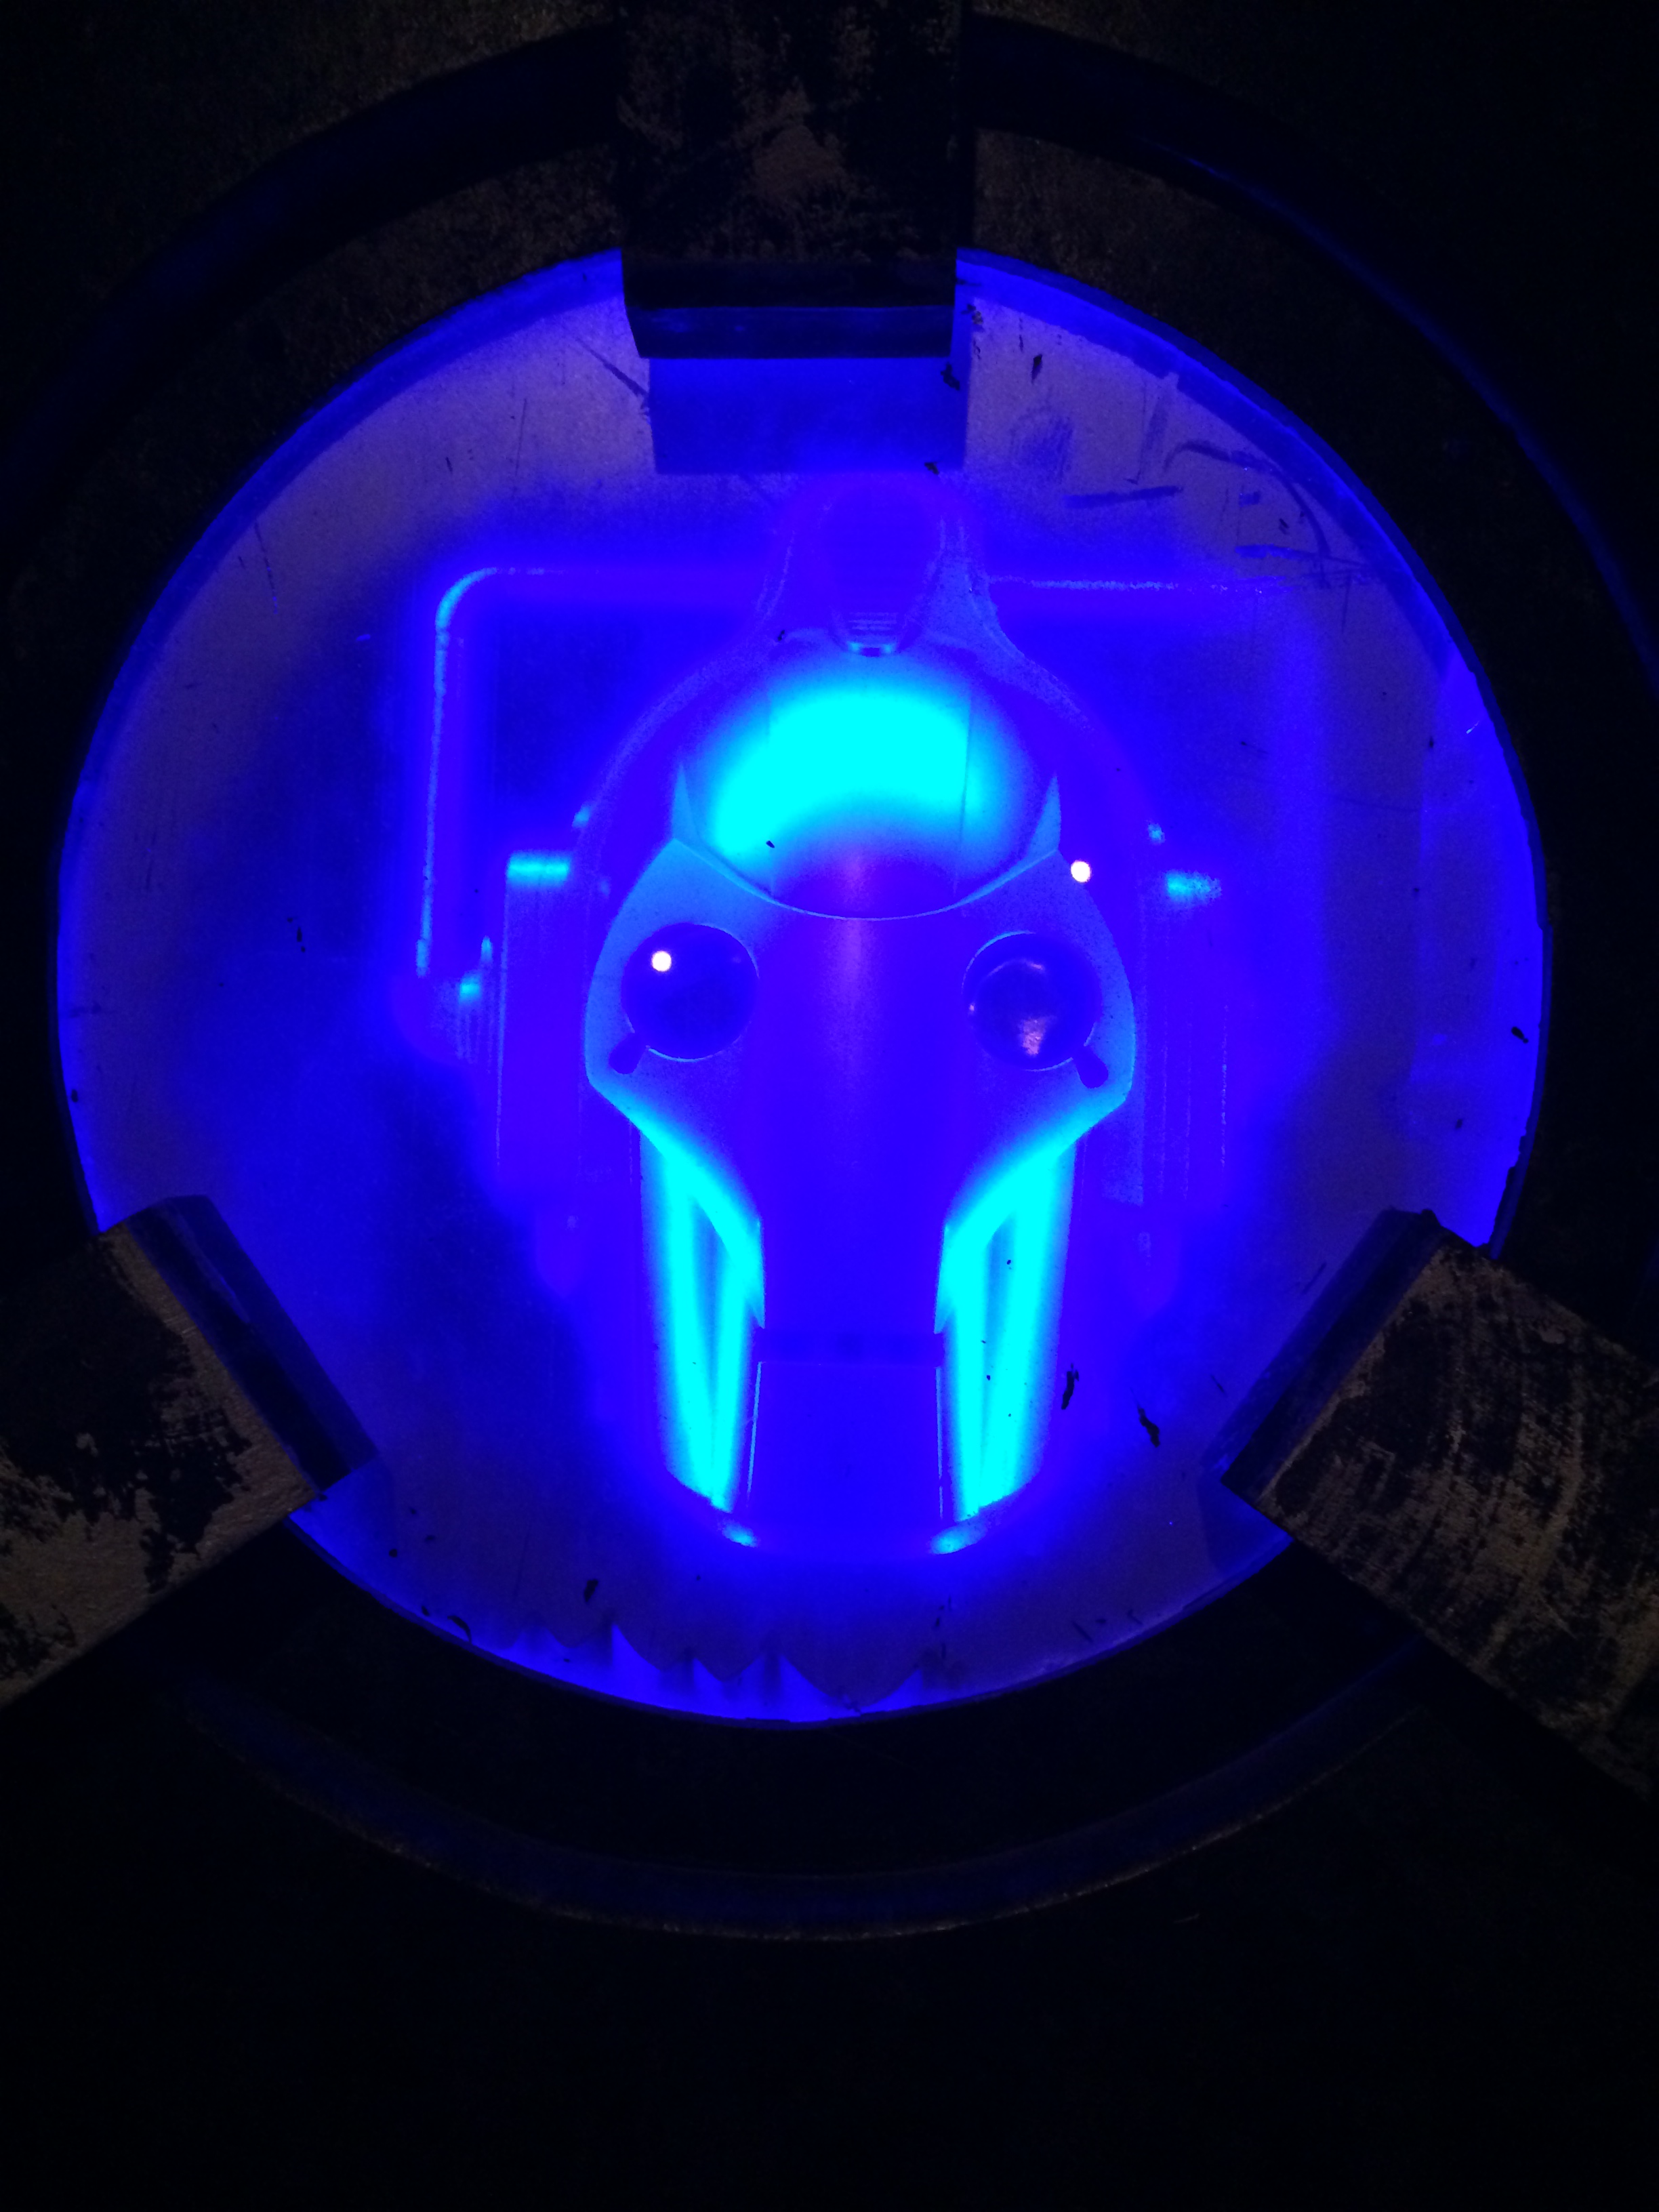
I would definitely class the Doctor Who Experience as a museum visit, due to the extensive amount of props, costumes and sets, almost all which have been used during the filming of various episodes across a 50 year span – which is AWESOME. Now we weren’t allowed to take photos or film the Interactive bit, but we did have free reign in the Exhibition Hall to take as many photos as we wanted.  I won’t be sharing ALL the photos I took (mainly because there are too many), but because it would take away from personally experiencing it for yourself – so I have included just a few of my favourites.

Wednesday Walks | Doctor Who Experience | Tenth Doctor

Wednesday Walks | Doctor Who Experience | Eleventh Doctor

Wednesday Walks | Doctor Who Experience | Tardis Console

Wednesday Walks | Doctor Who Experience | Tardis

Wednesday Walks | Doctor Who Experience | Cyberman

Wednesday Walks | Doctor Who Experience Dalek

Wednesday Walks | Doctor Who Experience | Weeping Angel

Wednesday Walks | Doctor Who Experience | Eleventh Doctor Tardis

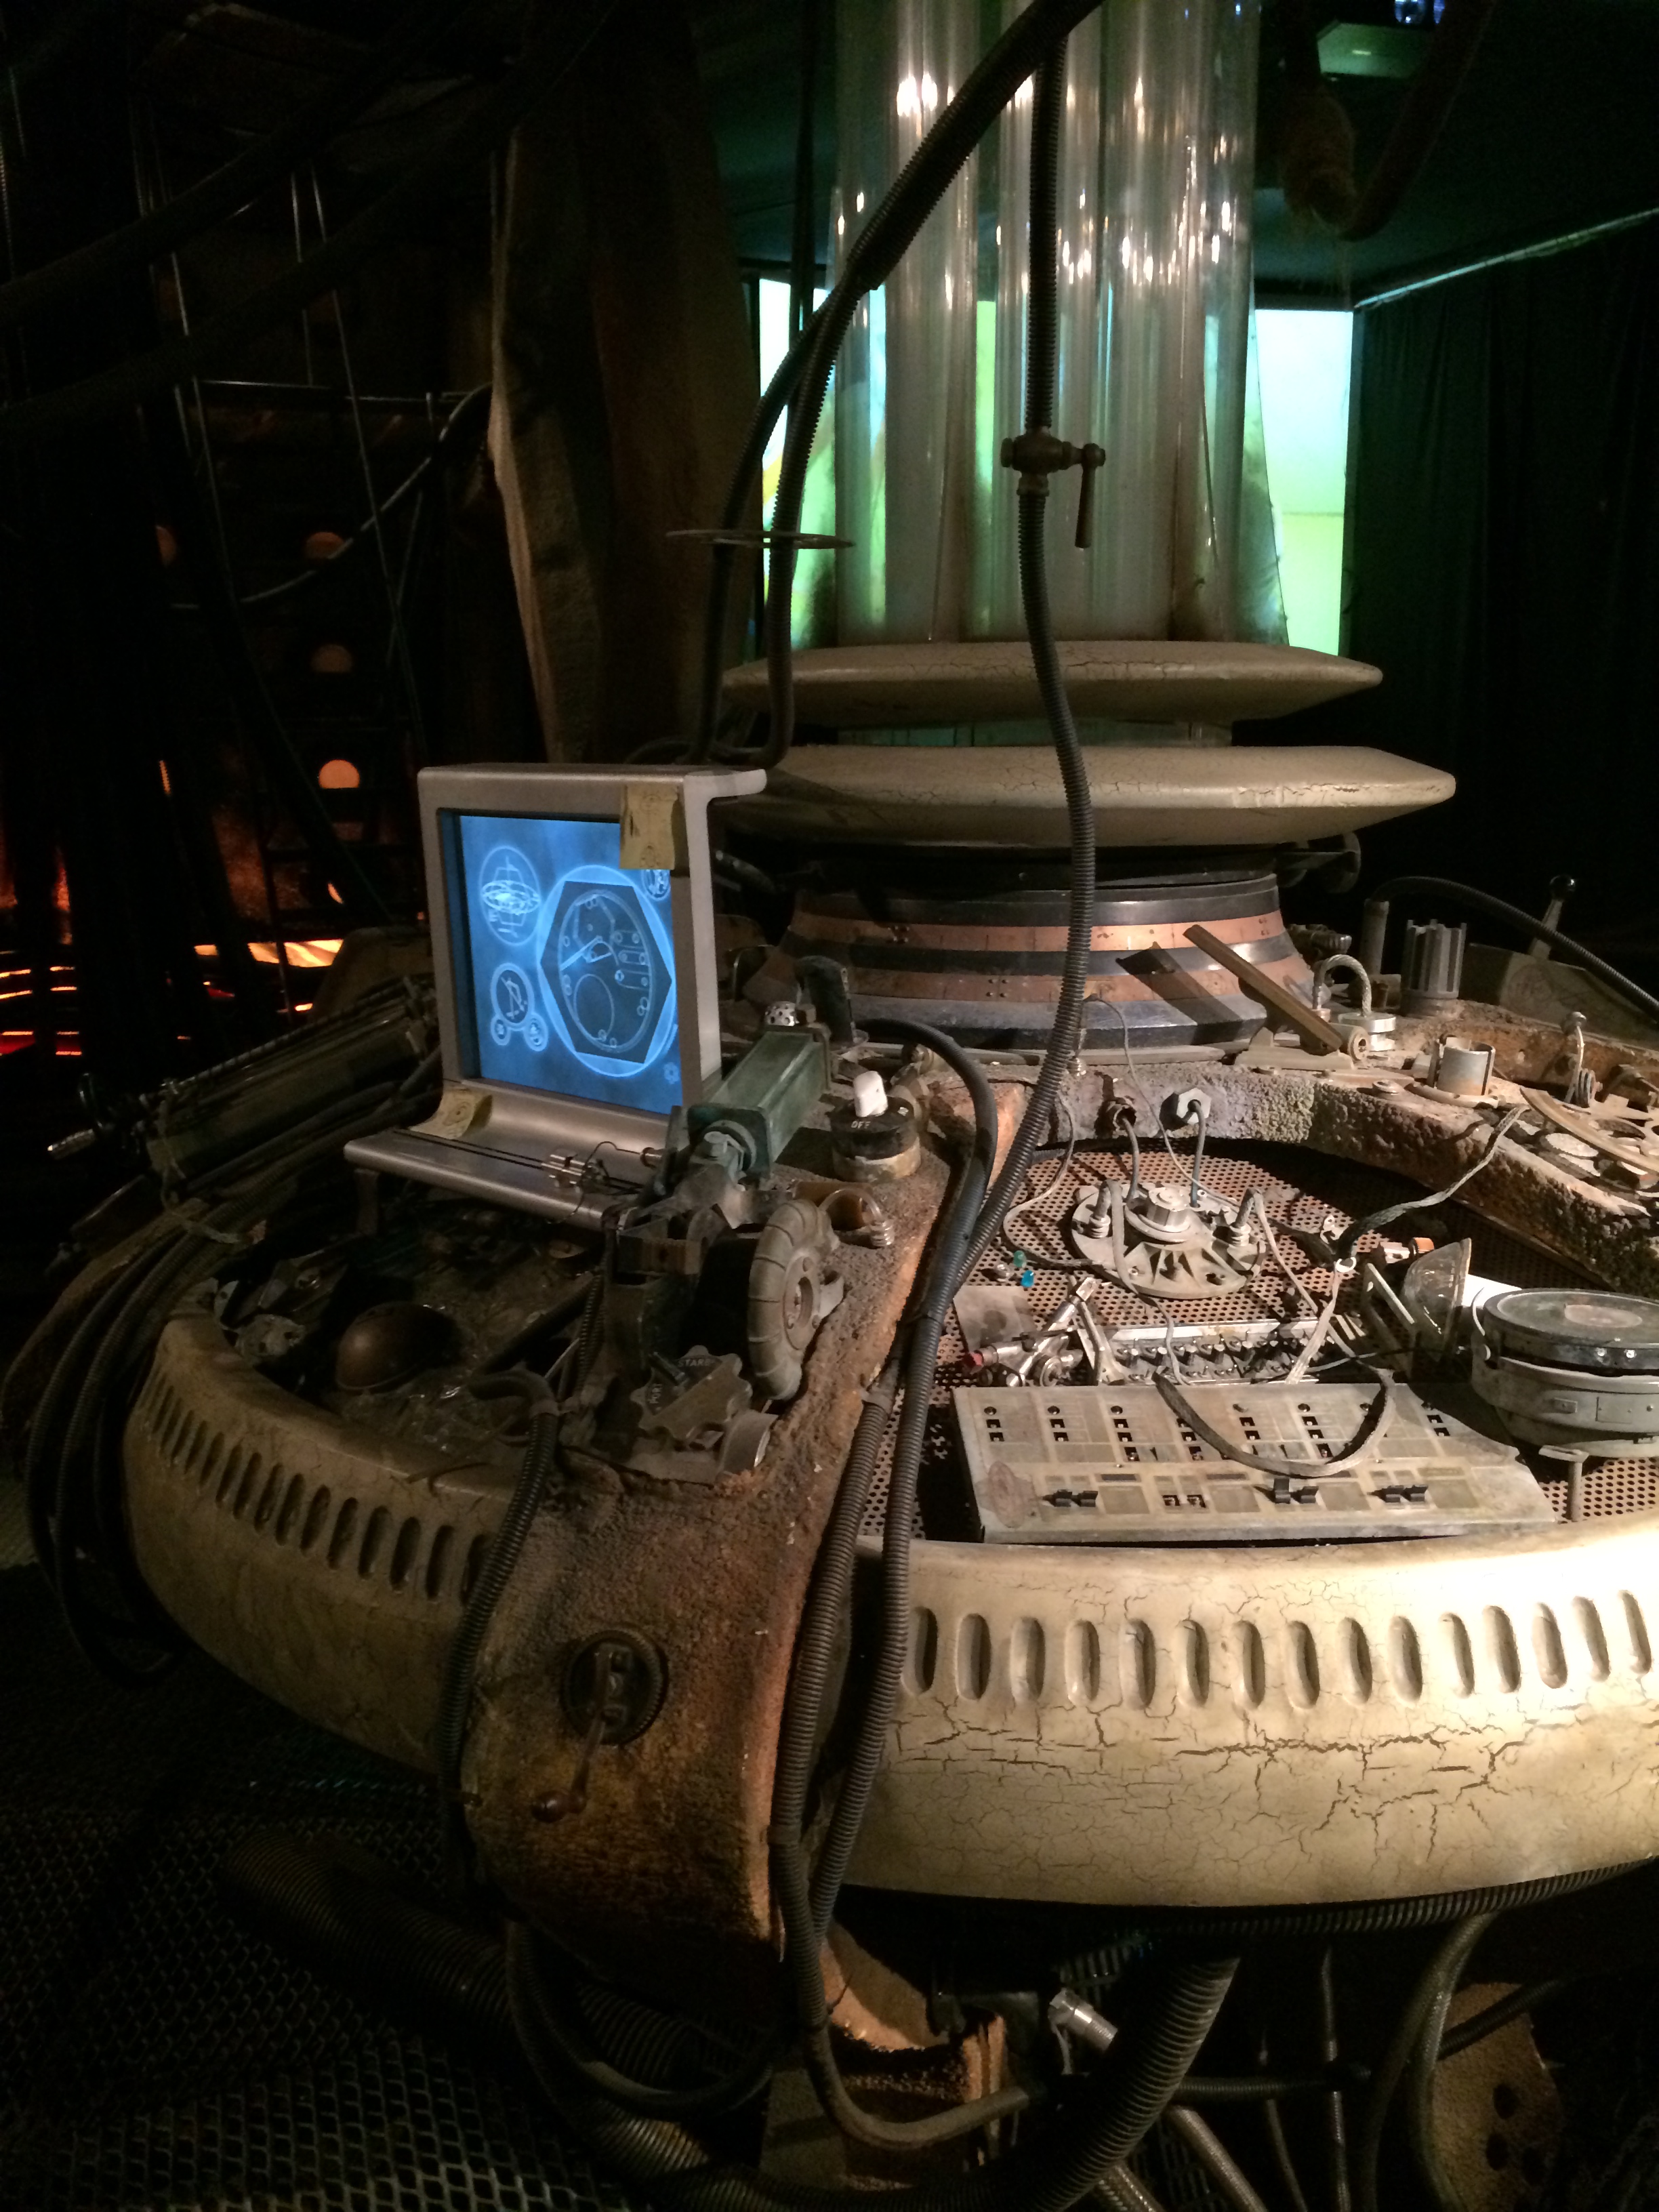
Needed a picture with Tennant’s Tardis of course

I really enjoyed my time at the Doctor Who Experience, and think it’s a great place to check out if you haven’t already – especially if your children enjoy watching Doctor Who!  I’ll definitely be going back again and hopefully get a chance to do The TARDIS Tour and the Walking Tour.

You can check out my previous posts when I visited the National Museum Cardiff for a bit of a natural history fix and also when I checked out the Museum of Science & Industry in Manchester.

Thank you for reading this post, and please do give it a like if you have enjoyed it (and give the blog a follow using the links if you haven’t already!).  Let me know if you have visited the Doctor Who Experience before, and if so, what did you think? Leave me a comment below 🙂

Until next time! x

Monday Muses | Rebecca Keegan

(PLEASE NOTE: Pictures that I share as part of Monday Muses will be a direct link to the original posted by said Muse for which of course, they are fully credited for.)

For this week’s Monday Muses, I thought I would bring it a little closer to home and introduce you to someone I have known since my school days (in other words, a LONG time ago!).

This is Rebecca Keegan – a Textile Design Graduate, self-confessed illustration enthusiast and lover of tea and cake (well who isn’t!)

https://www.instagram.com/p/yPgimgDuDz/

This amazingly talented gal is inspired by all things nature – especially if it involves bears and forests!  Most of her work takes on Scandinavian/Nordic themes, which I just love and thinks it adds to her nature themes.  Rebecca uses a mixture of printing by hand and digital drawing to create her prints as well as the odd bit of laser-cut wood designs.

https://www.instagram.com/p/v_DN-_juKv/

Here are a couple of my favourites:

Rebecca Keegan - Stack O Mugs - Monday Muses

Photo & Artistic Credit – Rebecca Keegan

Rebecca Keegan - Lost in the Woods

Photo & Artistic Credit – Rebecca Keegan

She also designed her own personal hair accessories for herself and her bridesmaids for her wedding day – fitting in with her woodland theme.  SO CUTE.

Rebecca Keegan - Laser Cut Wedding Hair Piece

Photo Credit – Rebecca Keegan

She sells her pieces online under the Hey There Bear name but she often gets involved in various craft fairs as well.  You can check out her Etsy Shop and her Society6 page if you want to check out and buy her cute, whimsical wares.

And if that wasn’t enough, she has also licenced some of her designs to be made into iPhone cases as well via Keka Cases!

Other Links for Rebecca Keegan

Don’t forget to check out my previous Monday Muses where we took a look at Miranda Yeo and Zoe Sees in case you missed them.

If you have enjoyed this week’s edition of Monday Muses then don’t forget to like this post and leave me a comment below (and give me a follow too using the links if you haven’t already!) 🙂

Until next time! x

Food | Health: Whipped Coconut Body Butter

Today’s post is a slightly different one – it’s another Pinspiration, but this time it involves using food for other health benefits (you know, other than eating).  I recently bought some coconut oil (you can find it at Holland & Barrett) to use for my hair and the odd bit of cooking.  My hair lately has not been in the best of conditions, so I wanted to give it a bit of a helping hand and condition the hell out of it.  I usually put it on all over my hair the night before, tie it all up and then the next day, wash it all out.  I have been leaving my hair to dry naturally 99% of the time, but I have noticed a difference into how much more tamed my frizziness is as well as how much more glossy and healthy my locks look and feel.

I love browsing through Pinterest to get some more ideas on how to utilise my coconut oil more and stumbled upon a few posts of making my own whipped coconut oil body butter (sounds yummy enough to eat!) – so I thought I would give it a go, and it couldn’t have been more simple!

Ingredients

Coconut oil

Vitamin E oil

A few drops of your favourite essential oil for fragrance (optional)

Coconut Oil and Vitamin E Oil

I actually skipped out adding the essential oil bit because I really love the smell of coconut oil, as its wonderfully tropical, but you only need a few drops if you do.  The Vitamin E oil I bought was a slightly cheaper one, as it’s not one you can consume (but if you want to go for a more expensive one that’s cool too!) and I wasn’t planning on eating my body butter (even if it sounds LUSH).  The added bonus is, that the Dr Organic range is against testing on animals – yay!

*Before you start, you need to make sure your coconut oil is in a solid state and NOT melted otherwise you won’t be able to whip it!

  • I started by scooping two tablespoons worth of coconut oil into a clean bowl.

IMG_6493

  • I then added a teaspoon of Vitamin E oil to the bowl.

IMG_6494

  • Then, I used my electric hand whisk (a free-standing one is also fine) to whip up the ingredients, until it was soft and creamy.

IMG_6496

  • I then scooped out my body butter and put it into a clean glass jam jar (you can use whatever you want, but I think glass jars are pretty and a great way to recycle).

IMG_6497

And TA-DA!  There’s your own homemade body butter!  I absolutely love applying this all over my body after I’ve showered, and really working it into the skin.  And with the added benefits of Vitamin E oil, which helps with dry, uneven skin and helps reduce the appearance of scars and stretch marks; I am noticing a huge difference in my skin!  I also apply it to my face in the night as well.  I think this would be a perfect gift idea to give to someone as it’s so quick and easy to make.IMG_6498

*Please be sure to do a patch test of all the ingredients first, in case you are sensitive to any of it – but so far I haven’t had any issues.

I also used some of my coconut oil to make these delicious flourless pancakes – a healthier alternative packed full of yummy goodness!

Have you tried to make your own homemade health and beauty products before?  Do share your ideas in the comments below!  And if you liked this post then don’t forget to give it a like and a follow using the links 🙂

Until next time! x

Wednesday Walks | Museum of Science & Industry Manchester

If you didn’t know already, I love museums.  I love strolling through them and immersing myself in history, culture and art – always makes me feel like I’m learning something new about the world all the time.

Today’s post features my visit to the Museum of Science & Industry in Manchester, on what was a very cold, wet and windy day.  Horrific.  Unfortunately this was not helped by the fact that the Museum itself is split up into four separate buildings (all of which are very large warehouse type buildings, meaning there isn’t a lot of heat!) and that I have terrible circulation.

Nevertheless, I got to see some awesome stuff, some of which I took some very rubbish pictures of! (Not totally my fault – it was just a very dimly lit museum!)

IMG_5634  IMG_5639

IMG_5641 IMG_5635 IMG_5638 IMG_5640

This very delicate garment is made entirely out of dandelion seeds – how cool is that!? IMG_5645

 I know it’s a turbine, but I just imagined that it was a very large seashellIMG_5650 IMG_5652 IMG_5654 IMG_5655 IMG_5658 IMG_5642

Aside from the terrible weather, I had a good little browse.  I think it’s a great sort of place for a family day out as it’s right in the middle of Spinningfields – so afterwards there are plenty of places to grab a bite to eat or do a little bit of shopping.  I’ll be sure to check it out again…maybe when the weather warms up a bit and stops raining!

Don’t forget to check out how I spent my lunch break last week at The National Museum Cardiff.

If you have enjoyed this post, please do give it a like (and give the blog a follow too using the buttons if you already haven’t!) And comment below if you have been to the Museum of Science & Industry before, and if so, what did you think?

Until next time! x

Monday Muses | Miranda Yeo

(PLEASE NOTE: Pictures that I share as part of Monday Muses will be a direct link to the original posted by said Muse for which of course, they are fully credited for.)

For Today’s edition of Monday Muses, we’re going to take a look at the talented Miranda Yeo (who also goes by the nickname ‘Snarkies’) who is a freelance character designer and a recent animation graduate.

Her Instagram holds a whole host of her character designs, which almost all of them follow a particular artistic style (think old school Disney – big eyes and dainty features).

Being a HUGE fan of The Lord of the Rings, some of my favourite work of hers to date are her recent drawings of the characters:

Animated dresses from the 2015 Oscars:

Some gorgeous ink-work:

And alongside those, she does a lot of cute mermaid sketches (which she posts using #MondayMerms):

I think because I grew up on all things Disney, I can really relate to Miranda’s art style – she has a way of turning simple, delicate drawings into something that really has a great impact.  No two drawings are ever the same, characters always have something unique about the way they look and the way they are posed.  You can check out her Tumblr for more links to her social media profiles, Etsy as well as her portfolio.

I hope you have enjoyed reading about another wicked artist in this edition of Monday Muses, and please don’t forget to give it a like (and a follow if you’re not already)!  Don’t forget to give Miranda Yeo a follow on her Instagram and Tumblr if her passion has put a smile on your face!

If there are any other creatives out there that I should check out – be it an artist, musician, writer…then comment about them below with a link to their work – I love discovering new people all the time!

Until next time! x

Food | Baking: Flourless Pancakes

Today is a bit of an easy one, and it’s something that I saw plastered all over Pinterest and I thought I would give it shot! There is no specific “owner” of this recipe (not that I know of) and it is a healthier alternative to normal pancake recipes because it doesn’t use any refined sugar or flour – so if you go gluten free, this is something for you to try!  I also recently purchased some (fair trade) extra virgin coconut oil from Holland & Barrett, so was excited to use this to cook with!

Ingredients

1 banana, mashed

2 eggs

pinch of cinnamon (optional)

1 tbsp coconut oil, for frying

To Serve

Whatever you want!

  • In a bowl, mash the banana as well as you can before adding the eggs and then whisk together until everything is incorporated. (You can use a processor/blender if you want to make the mix as smooth as possible).
  • As there is no sugar in the recipe, I added a pinch of cinnamon.
  • In a frying pan, I heated the coconut oil and then added the pancake mix a little at a time to make smallish pancakes so that I could make a stack. (You can make them any size you want!)
  • After frying each pancake on both sides until golden brown, I stacked them up on a plate and served with some blueberries and a sneaky serving of maple syrup (not totally healthy after all, but shhhhh!)

IMG_6073

This is SO easy and quick to do, so it’s great for the morning to give you a boost of much needed energy and protein with the combination of banana and eggs, top with some yummy fruit and you’re good to go! (Goes great with a spread of Nutella too!) This is also a great recipe to try for Mother’s Day today and even the little un’s can help out!

I have pinned a lot of food ideas on Pinterest and I am only slowly starting to give the recipes a try!  Have you ever tried out an idea you have seen on Pinterest or Instagram?  Let me know in the comments below, and if you enjoyed reading then please like this post (and give me a follow using the links if you already haven’t!).

Until next time! x

Wednesday Walks | National Museum Cardiff

If you read Stylist, you may have heard about the #ReclaimYourLunchBreak campaign, aimed to get people out of the office and away from their desks for an hour in order to create a better work-life balance.  This is such a great campaign, as so many people will work through lunch with a sad little sandwich to see them through, often leaving them tired and low.  In support of this campaign, I decided to go out and get a little bit of fresh air and wandered down to the National Museum for a bit.

I absolutely adore going to museums, I love to walk around and immerse myself in the history of our world and learn things I never knew before, so this was always going to be a good idea!  Aside from the day being as gloomy as it could possibly be, I went along to see what I could nose at for an hour.

 IMG_5745

 IMG_5721

 IMG_5722

 IMG_5723
IMG_5725

IMG_5728
 IMG_5735
IMG_5737
 IMG_5729

 IMG_5732 IMG_5733

       IMG_5741   IMG_5719 IMG_5718 IMG_5717

It was actually really nice to be able to stretch my legs and have a walk around, even if it was only an hour long, but I definitely felt that I had a bit more energy and focus for the rest of the day, and I saw some pretty cool things too!

Are you one to chain yourself to your desk and work straight through your lunch hour, or do you relish an opportunity to escape when you can?  Don’t forget to like this post if you have enjoyed reading (and give me a follow too using the links!) and comment below if you have any lunch break escape ideas 🙂

Until next time! x

Monday Muses | Zoe Sees

Hello!  It’s me again – that person that blogs for a bit and then randomly disappears because something else takes over their life for a while.  Yeah, sorry about that.  All I am going to say is that there are two weddings and an engagement coming up (pretty much one weekend after another) at the end of this month and into April, so it’s been a little hectic.  If you don’t already know, Desi clothes shopping – especially for weddings, is an extremely difficult palaver.  It involved two days in Birmingham and one in London trawling every single shop for outfits that 1) were preferably ready-made, 2) didn’t need alterations and 3) weren’t freaking hideous.  Suffice to say, we managed to get it done.  Ugh.

Moving on!  As you may have noticed from the title, I am doing another little addition which I have been wanting to do for a while.  I am one of those people that will spend a lot of time on Instagram simply admiring people’s artwork that they have been sharing – and I find it so nice to see so much creativity filling up my feed, that I thought I would dedicate a spotlight post on someone different every Monday that has caught my eye that I feel I should share with more people.

(PLEASE NOTE: Pictures that I share as part of Monday Muses will be a direct link to the original posted by said Muse for which of course, they are fully credited for.)

Today’s edition features Zoe Sees who is a cartoonist, illustrator AND a lawyer (talented or what!).  On her personal website she says “I believe that wherever words fail, a mildly disparaging cartoon can usually succeed.”

Her Instagram has a combination of different artistic styles including ‘Slice of Life’ comics featuring a very cute version of herself and her partner:

Cartoon sketches of people she observes

Life-like sketches

And among her artistic posts, there are some of her cooking and baking feats and the odd selfie post, and if you’re lucky – the odd little video of a jam session (she has the sweetest voice).  She is one of those people that I feel are constantly brimming with such creative potential, and I always find myself looking through my feed for one of her posts – mainly because they are usually filled with such real life humour, that they genuinely make me chuckle.

You are also able to buy her work from her Etsy shop which features some seriously cute prints!

I hope you have enjoyed the first edition of Monday Muses, please don’t forget to give it a like (and a follow if you’re not already!) and hopefully I have introduced you to someone who was previously unknown to you!  Don’t forget to give Zoe Sees a follow on her Instagram and Website if her passion has put a smile on your face!

If there are any other creatives out there that I should check out – be it an artist, musician, writer…then comment about them below with a link to their work – I love discovering new people all the time!

Until next time! x

Food | Baking: Schichttorte

So, I was actually deliberating on whether I was going to share my latest bit of baking with you lot because I was actually very disappointed by the results (as I am a bit of a perfectionist) but hey ho, here is my attempt at trying out a schichttorte (yes, that 20-layered German cake from The Great British Bake Off).

This recipe is from Paul Hollywood and can be found on the BBC – Food Website.

Recipe

Cake

10 large eggs, separated

100g/3½oz unsalted butter

150g/5½oz caster sugar

1 large lemon, zest only

1 tsp vanilla bean paste

150g/5½oz plain flour, sifted

65g/2¼oz cornflour, sifted

oil, for greasing

6 tbsp apricot jam

Chocolate Glaze

50g/1¾oz unsalted butter

1 tbsp golden syrup

1 tbsp rum

1 tsp vanilla bean paste

75g/2½oz plain chocolate (36% cocoa solids), finely chopped

Vanilla Glaze

250g/9oz icing sugar

1 tbsp rum

½ tsp vanilla bean paste

1-2 tbsp milk

IMG_4412

  • After I managed to separate all 10 eggs after a little bit of difficulty, I then whisked the egg yolks using a hand-held whisk on high speed until the mixture became pale, thick and creamy.

                                 IMG_4419IMG_4420

  • In another bowl, I creamed together the butter and sugar until pale and creamy.  I then added the zest of one lemon and 1 tsp of vanilla extract (but you can use vanilla bean paste if you have it) and mixed well.

IMG_4413IMG_4415IMG_4417

  • I added the whisked egg yolks and mixed well.  I then added the flour and cornflour (which I sifted together beforehand) in installments to make it a little easier to mix.

                                 IMG_4421IMG_4422

                                 IMG_4423IMG_4424

  • In yet another bowl, I whisked the egg whites until soft peaks formed.

                                 IMG_4425IMG_4427

  • I stirred one-third of the egg whites into the batter to loosen it a little and then I gently folded the rest of the egg whites into the batter.

                                IMG_4428IMG_4429

(I do have to apologise for the poor lighting in most of these pictures, it started to get dark outside when I started this and so struggled to get enough natural light in order to take nicer photos!)

  • I preheated the grill to high and then greased a 20cm/8in round springform tin with a little oil and lined the base with greaseproof paper.  I then spooned a little bit of the batter into the tin and spread it across the bottom evenly.

                                 IMG_4430IMG_4431

  • I then placed the tin under the grill and kept a watchful eye over it for a couple of minutes until it was a light brown colour.  (As you can see, it went slightly darker than I wanted it to as my high grill setting was just TOO high so I had to turn it down).

IMG_4434

  • I kept this up over the next couple of hours and noting down which layer I was grilling by marking 1L, 2D, 3L, 4D etc. (L = Light; D = Dark of course!)
(At this point, I was knackered and boiling hot from standing in front of the grill 99% of the time and some of my timings started to slip a little – I will say however, that I had enough batter for 20 layers, HURRAH!).
  • After I finished grilling all my layers, I absolutely started to hate this cake but I left it for a little while to cool down before turning it out on to a wire rack.

(At this point I was wondering what the heck happened to my 20 layers).

IMG_4436

  • Nevertheless, I continued!  I melted the apricot jam in a pan and then pushed it through a sieve (I actually think 6tbsp seemed a bit much so I lessened the amount).  Using a pastry brush, I brushed the jam all over the top and sides of the cake.

IMG_4438

  • For the chocolate glaze, I began by melting the butter, golden syrup and vanilla extract in a pan (didn’t use any rum of course!).
  • IMG_4437After the mixture incorporated together, I finely chopped the chocolate (I couldn’t find chocolate that was 36% cocoa solids and so went with 70%, but in hindsight, maybe I should have used milk chocolate!) and after the syrup mixture cooled a little I added the chocolate and stirred until it had melted.  I then left the glaze to cool to a coating consistency.
  • I made sure to place some parchment underneath the wire rack holding the cake before pouring the glaze over the cake.

IMG_4440

  • For the vanilla glaze, I started by sifting the icing sugar into the bowl to which I added the vanilla extract and milk (no rum) and began stirring until smooth.  (For some reason I couldn’t get the glaze to thicken enough and in the end I was so hot, bothered and tired that I gave up and just used it.)

  • I then went a bit nuts with the drizzle, and because it hadn’t thickened enough, it sort of spread a bit too much…

IMG_4444

So, all in all I was quite disappointed by the end result, especially when I finally tasted it.  IT WAS SO DRY.  Oh, I wanted to cry, all that effort!  No need to eat your heart out just yet Paul Hollywood!  I think next time, I’ll stick to something a little less ambitious!

Have you ever tried something as ambitious as this cake and how did it turn out?  Let me know in the comments below!

Until next time! x